 |
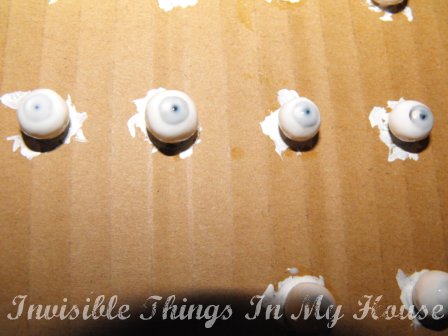
| Milky eyes from the fresh Gallery Glass. It dries clear, but I like the effect. |
I've devised my own method of applying laquer, because I always get air bubbles with the "lens method" which is basically just a drop of laquer applied straight onto the pupil where it spreads a little covering the iris and creating a lens.
1. Squeeze a generous amount of laquer on a palette (in my case usually cardboard or tinfoil) and dip a soft medium sized brush (no. 4 round for example) into the laquer. Be careful not to stir air into the laquer and create bubbles. Pick up quite a lot on the brush, while avoiding the visible airbubbles.
2. Next touch the brush to the pupil, and let the laquer flow onto the eye, creating a lens. Normally this is where you'd stop, but I have an extra step to get rid of the air bubbles:
3. Swirl the "lens" lightly with the tip of the brush and start spiralling in bigger circles until you have moved outside the iris and continue around the eyeball all the way down almost to where it's attached to the stand. The little airbubbles are moved from the iris area to the eyeball and down to the base where they can't be seen. If you spot an air bubble still on the iris, touch the tip of the brush to it and gently drag the bubble down, away from the iris.
4. If the laquer is uneven around the eyeball and you want to fix it, just dip the brush in the laquer again and touch it to the uneven areas and brush down or around, whichever direction works for you.
Be careful to add fresh laquer onto your palette if the process takes longer than a few minutes. It should flow easily and not get sticky while you're applying it.
5. Let the laquer dry at least a couple of hours, or preferably until the next day just to make sure it's dry. Repeat as many times as you like until you get the look you want.
It probably sounds a bit complicated, but it's just applying a dollop of laquer on top and moving it around and outward. Works for me, and I hope it will work for you too!
Ei kommentteja:
Lähetä kommentti